
I’ve always loved plaid. Okay fine I’ve always been obsessed with plaid. Even, apparently, way back when I was around 2 and rocked this buffalo plaid fleece everywhere:

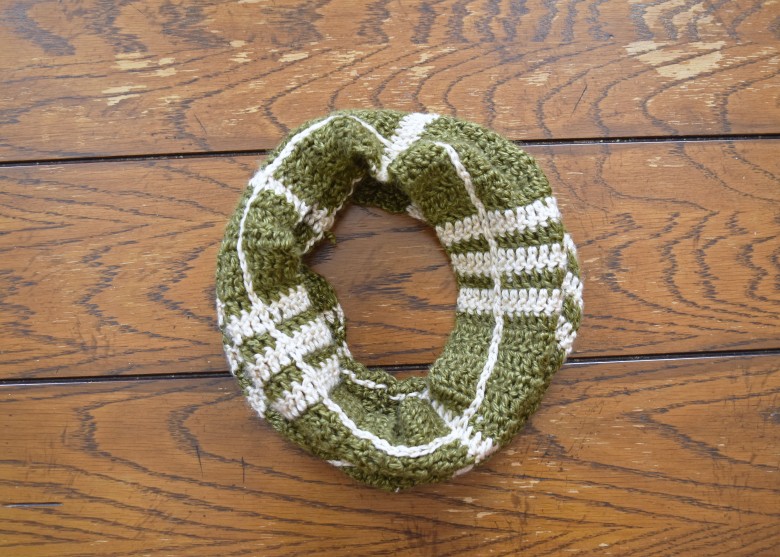
If it’s green and plaid, I really can’t resist. Two of my favorite things. When I was deployed and crocheting a LOT, I decided to make myself a green plaid cowl!
I did a lot of Pinterest-ing ahead of deciding which technique I was going to use. I wanted to start with the simplest one – firstly because I like clean simple things, and secondly because these plaid patterns can get really complicated really fast.
When I made the original cowl, I used a technique where I created a “hole” (eyelet) by chaining one and skipping a stitch in the same place on each row, which lined up to create a vertical ladder of sorts. I then slip stitched/chained my way through the ladder once the body of my cowl was completed. This is generally known as “surface crochet.”
I recently started working on a plaid throw blanket, where I am creating the plaid using intarsia. Instead of skipping a stitch to create an eyelet, I dropped my yarn and completed the stitch with my second color. This is super easy to do when you only have 2 colors! I’ve seen amazingly beautiful plaid patterns that involve countless color changes and the use of many many bobbins. They look like legit woven tartans. It’s incredible. But honestly…..I’m just not that motivated right now. #momlife

I wanted to share these two methods for creating super simple plaid crochet pieces: using surface crochet and intarsia. The following techniques serve as a baseline to make whatever your heart desires! They will predominantly use double crochet and are intended for a simple plaid design involving 2 colors.
If you don’t want to experiment, you can find the patterns for my Simple 2-Color Plaid Cowl and the Rustic Tartan Throw blanket in my Etsy and Ravelry shops!

Crochet Plaid Technique #1: Surface Crochet
This is the method I used for my Simple 2-Color Plaid Cowl. I used Lion Brand Heartland yarn in Joshua Tree and Acadia.
Stitches & Abbreviations:
- ch = chain
- dc = double crochet
- ch sp = chain space
- sl st = slip stitch
Template:
Using your Color 1, create a foundation chain to your desired length. Row 1: Dc in 3rd ch from hook. Dc across the row, completing a *ch 1, skip next st, dc in next st* wherever you have planned a vertical column. Ch 2 and turn. Row 2-end: Dc into next dc. Dc across the row. Complete a *ch 1, skip next st, dc in next st* wherever you have planned a vertical column. At the end of the row, ch 2 and turn.
Color Pattern:
You will need to plan your horizontal stripes in Color 2. A simple example is as follows. Rows 1-8: Color 1 Row 9: Color 2 Row 10: Color 1 Row 11: Color 2 Row 12: Color 1 Row 13: Color 2 Row 14-25: Color 1 Rows 26-30: Repeat rows 9-13. Repeat this entire sequence. This will create a pattern of 8 rows of color 1, a section of 3 stripes of color 2, 12 rows of color 1, another section of 3 stripes of color 2, and back to 8 rows of color 1, and so on. You can continue or adapt this sequence for as long as you need your project to be. When you decide you are done with the body of the project, move on to creating the vertical stripes. 
Vertical Stripes using Surface Crochet:
Create slip knot using your Color 2. Lay the project on a flat surface. Position your hook and yarn at the base of one of your ch sp columns.
Hold the yarn beneath the body of your project, keeping your hook and loop above the project. Starting at the bottom, ch 1 into ch space on row 1 (yarn over and pull the yarn from behind the project to the front, and through the loop to create the chain stitch). Ch 1, again pulling the yarn from behind the project. *Ch 1 into ch space on the next row, ch 1.*
These pictures will walk you through a couple steps of the ladder:


Repeat * for all ch spaces in as many rows as you have. Your final chain should be on the outer edge, or on “top” of the project; ch 1 extra and pull tight to tie it off.
Repeat this for all vertical ch sp columns in your project.
NOTE: I used 2 chains in each eyelet to give the piece some stretch. I found when using only one chain per eyelet, it affected the stretchiness and drape of the project.

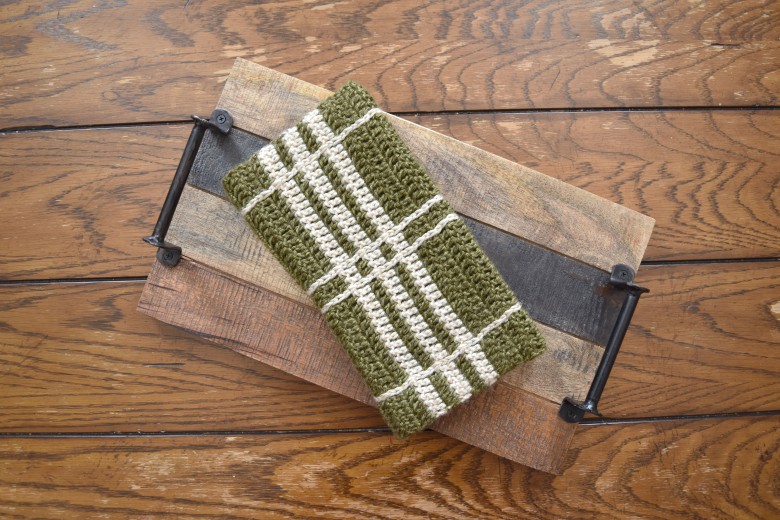
Crochet Plaid Technique #2: Intarsia
This is the method I used for the Rustic Tartan Throw, pictured above! For this chunky blanket I used Lion Brand Color Made Easy in Kombucha and Wheat.
Stitches & Abbreviations:
- ch = chain
- dc = double crochet
- sl st = slip stitch
- yo = yarn over
Template:
Using your Color 1, create a foundation chain to your desired length. Row 1: Dc in 3rd ch from hook. Dc across the row. Complete a color change using the intarsia method (described below) wherever you have planned a vertical column. Your vertical row should be 1-3 stitches wide of Color 2. At the end of the row, ch 2 and turn. Row 2-end: Dc into second dc from previous row. Dc to end of the row. Complete a color change wherever you have planned a vertical column by picking up the yarn from the previous row. Ch 2 and turn.
Color Pattern:
See the previous technique’s color change section for a sample pattern. NOTE: I recommend using intarsia to “change” your color even when completing your rows with Color 2. This will ensure the dropped yarn follows you as you move up in your project (and you will be able to pick it up when you switch back to using Color 1, I hope that makes sense).
Vertical Stripes:
The vertical lines will be created automatically by your color changes on each row.

How to Intarsia Crochet
Using Color 1, *begin a dc, but do not yo and pull through the second time to complete the stitch. For your last yo/pull through of the dc, drop your Color 1, pick up your Color 2 and pull through the two loops on your hook*. You will now have a loop of Color 2 on your hook. When you have completed the necessary stitches of Color 2, repeat * so that you finish with a loop of Color 1 on your hook.
Check out the play-by-play below:


Now that you know two very basic ways to create a plaid pattern in crochet, which will you use?
You can find complete patterns for my Simple 2-Color Plaid Scarf and my Rustic Tartan Throw in my Etsy and Ravelry shops!
Pin me!

5 thoughts on “Super Simple Crochet Plaid Technique”